If you’re running a successful online business with Shopify, expanding to Amazon is a powerful strategic move. Amazon is the world’s largest online marketplace, and a smart integration can open your brand to millions of new customers. However, the process isn’t as simple as it once was.
In this guide, we’ll walk you through the modern, up-to-date method for how to connect Shopify to Amazon effectively. Whether you’re a beginner or an experienced seller, this blog will help you navigate the app-based integration, manage inventory, and boost your brand’s visibility and sales. For a complete breakdown of Shopify’s platform, check out our in-depth Shopify review.
Why Connect Shopify to Amazon? The Strategic Pros and Cons
Before jumping into the how-to, let’s analyze the why. Integrating Shopify with Amazon can be a game-changer, but it’s important to understand both sides.
The “Pros”:
-
Massive Customer Reach: Amazon has over 300 million active users worldwide. According to Statista, Amazon accounted for nearly 40% of all US e-commerce sales in 2024. By listing your products on Amazon, you tap into a colossal, pre-built audience.
-
Streamlined Operations: A proper integration app helps you manage inventory, orders, and product listings from one central dashboard (your Shopify admin), preventing overselling and stock mismatches.
-
Boost Brand Awareness: The sheer traffic on Amazon provides a “billboard effect.” A customer might discover your product on Amazon and later search for your brand directly, driving traffic to your Shopify store.
The “Cons” (Expert-Level Considerations):
-
Significant Fees: Amazon charges substantial referral fees (typically 8-15%) on every sale, in addition to your Professional Seller account’s monthly fee. This will impact your margins.
-
Brand Dilution: On Amazon, you are competing directly alongside countless other sellers. It’s harder to control your brand story and customer experience compared to your dedicated Shopify store.
-
Customer “Ownership”: When a sale happens on Amazon, that person is Amazon’s customer, not yours. You have limited access to customer data for remarketing and building long-term loyalty.
Strategist’s Note: Don’t view Amazon as a replacement for Shopify; view it as a high-traffic acquisition channel. Your Shopify store remains your brand’s home base for building community, capturing higher-margin sales, and owning the customer relationship. The goal of integration is to manage this multi-channel strategy without creating an operational nightmare.
A Critical Update: What Happened to Shopify’s Native Amazon Channel?
You may find older guides that reference a built-in “Amazon Sales Channel” within Shopify.
This native integration was officially discontinued by Shopify in September 2023.
Any store that had it installed before this date can continue to use it (for now), but no new installations are possible. For all new sellers, using a third-party app from the Shopify App Store is now the only way to connect Shopify to Amazon. This guide focuses on this modern, app-based method.
Pre-Requisites to Connect Shopify to Amazon
Before you start, make sure you have the following in place:
-
An Active Shopify Store: Your store must be on a paid Shopify plan (not the “Starter” plan) and fully set up with products, images, and descriptions.
-
An Amazon Professional Seller Account: You must have a Professional Seller account (which has a monthly fee) on Amazon. Free “Individual” seller accounts do not have the API access required for any integration app to work.
-
Unique Product Identifiers (GTINs): Amazon requires most products (especially new listings) to have a valid GTIN (Global Trade Item Number), such as a UPC, EAN, or ISBN. If your products don’t have these, you may need to apply for a GTIN exemption from Amazon.
-
SKUs Must Match: For the easiest integration, ensure the SKUs (Stock Keeping Units) for your products in Shopify exactly match the SKUs you use in your Amazon Seller Central inventory.
How to Connect Shopify to Amazon (The Modern App-Based Method)
Here is the step-by-step process for integrating your store using a third-party app.
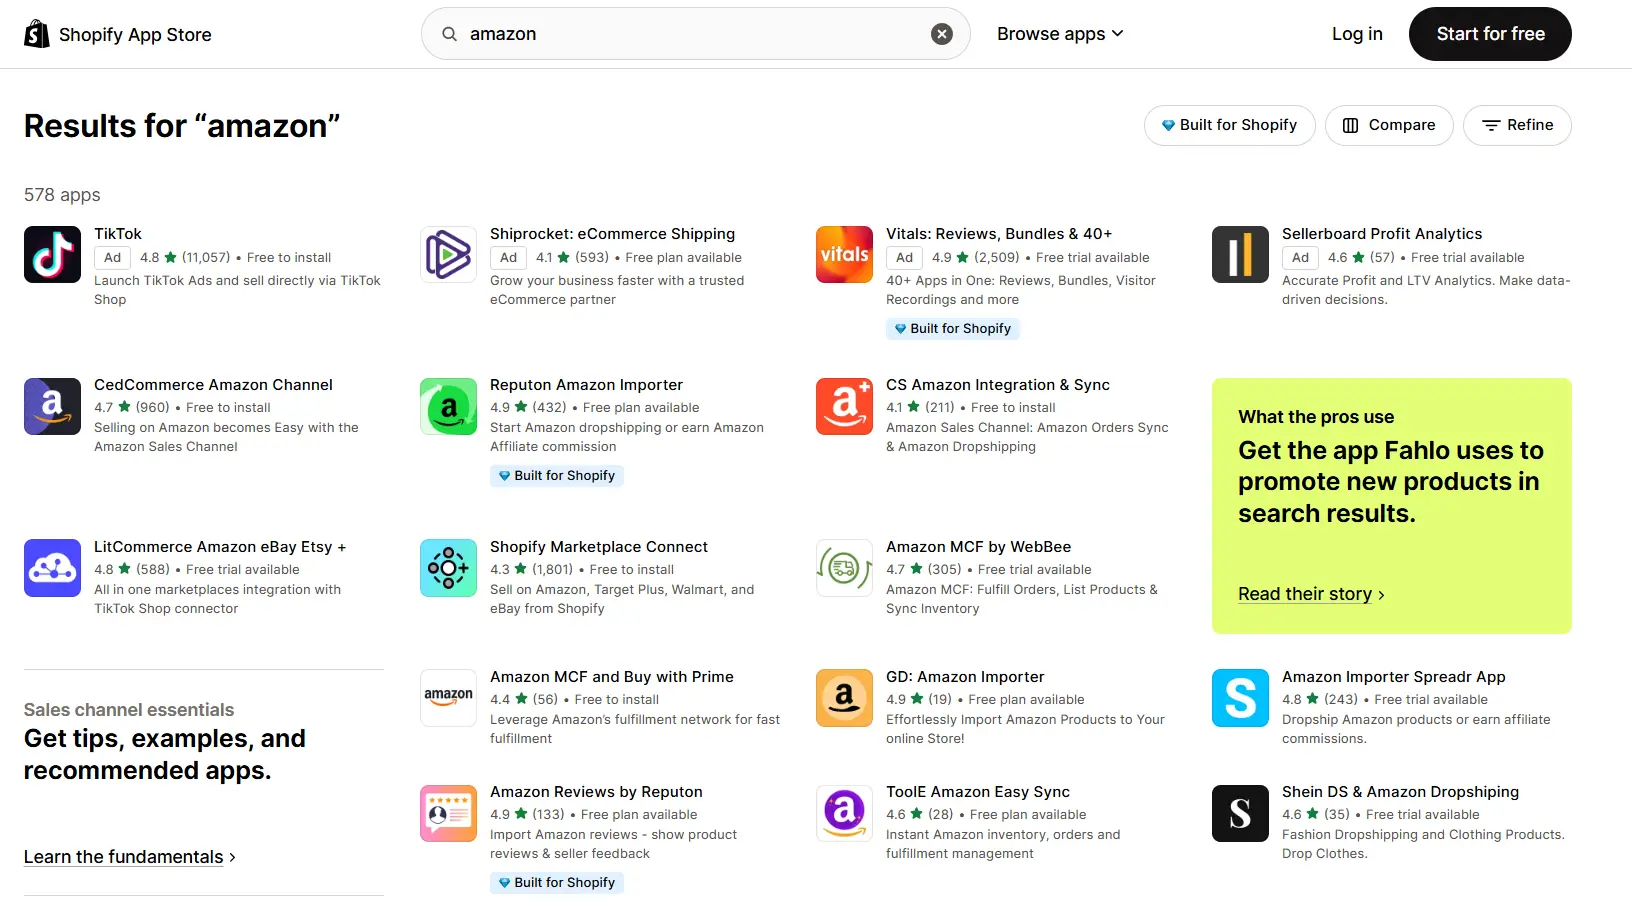
Step 1: Choose Your Shopify Amazon Integration App
This is the most important step. You are choosing the “brain” of your integration. Go to the Shopify App Store and search for “Amazon.” You’ll find many options, but the top-rated apps generally fall into two categories:
-
Listing & Sync Apps (Recommended): These are full-featured solutions that help you create new Amazon listings, link existing ones, and manage inventory and orders.
-
FBA-Only Apps: These are simpler apps designed only to route your Shopify orders to Amazon FBA for fulfillment.
Top Recommended Apps:
-
CedCommerce: Amazon Channel: A highly-rated, comprehensive tool that helps with bulk product uploads, real-time syncing of inventory and pricing, and order management.
-
LitCommerce: A popular multi-channel solution that allows you to connect Shopify to Amazon, eBay, Etsy, and more, all from one interface.
-
Codisto: A powerful “Amazon, eBay & Walmart” integration that offers advanced features like real-time sync and automated listing creation.
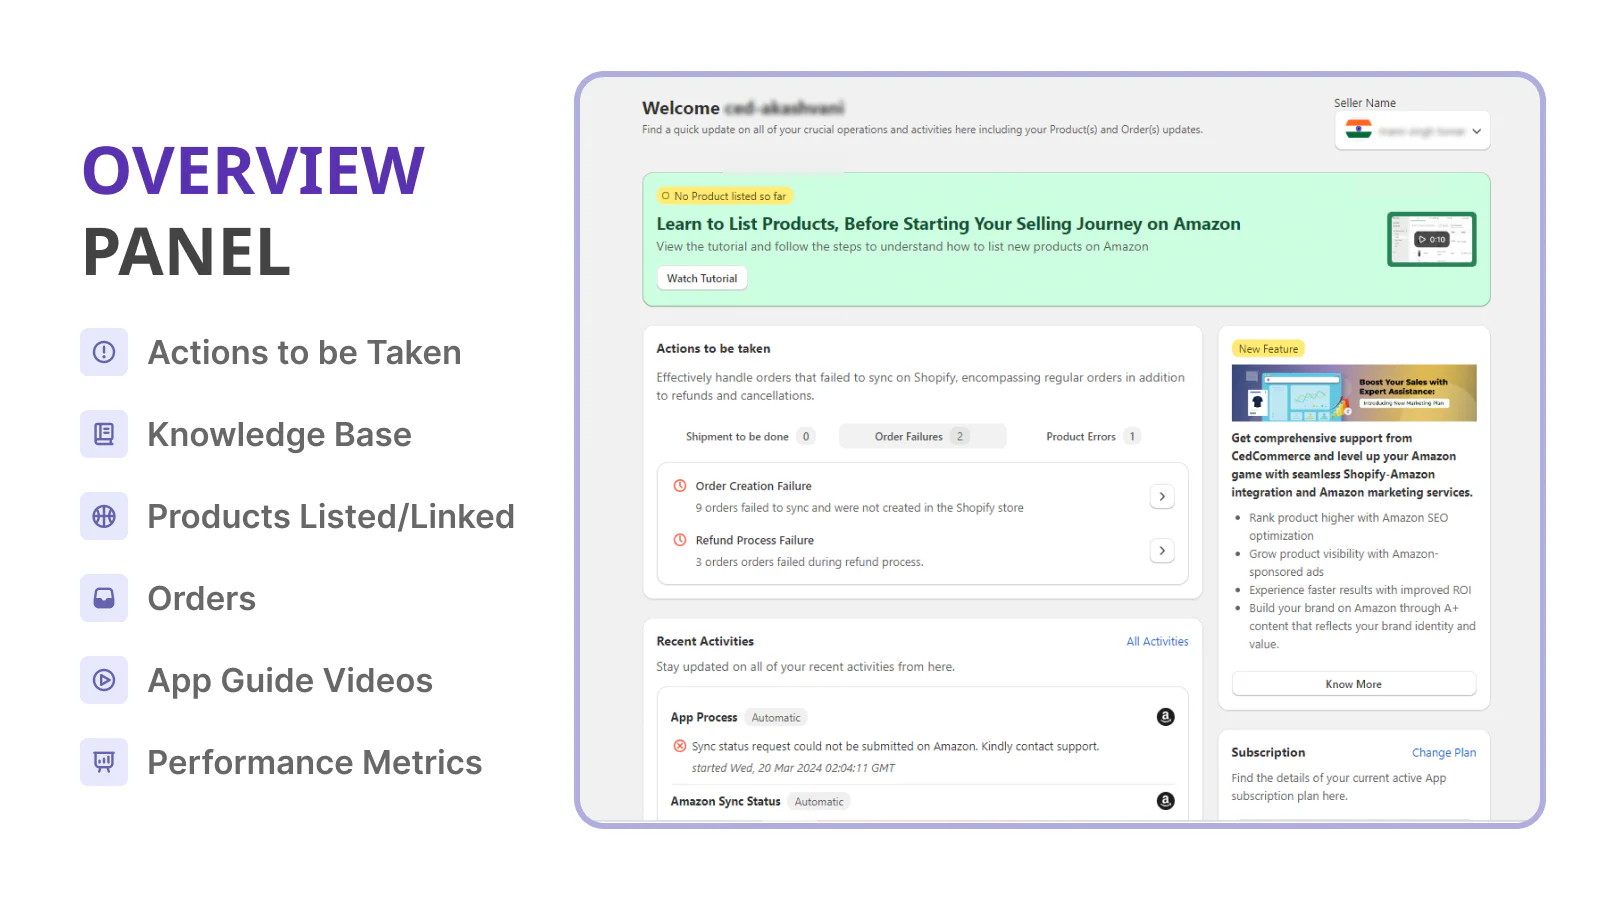
Step 2: Install and Configure the App
Once you’ve chosen an app, click “Add app” and approve the installation in your Shopify admin. You will then be guided through a setup wizard. This typically involves:
-
Connecting your Shopify store (which is done automatically).
-
Connecting your Amazon Seller Central account.
Step 3: Connect Your Amazon Seller Central Account
In the app’s setup wizard, you will be prompted to “Connect Amazon Account.”
-
You will be redirected to Amazon Seller Central.
-
Log in to your Professional Seller account.
-
You will be asked to grant the app (e.g., “CedCommerce”) permission to access your seller information, listings, and orders.
-
Authorize the permissions. You will then be redirected back to the app’s dashboard within Shopify.
Step 4: Configure Your Integration Settings
This is where you set the rules for how the two platforms will communicate. Key settings to configure include:
-
Inventory Sync: Choose whether inventory updates should be automatic. (Recommended: YES). Decide if Shopify or Amazon is the “master” source of inventory count.
-
Pricing Rules: Set rules to automatically adjust your Shopify price for your Amazon listings. For example, you might set a rule to “Increase price by 15% on Amazon” to cover Amazon’s fees.
-
Fulfillment Method: Decide how orders will be fulfilled (see next section). Will you ship them yourself (FBM) or use Amazon FBA?
Step 5: Link or Create Your Amazon Listings
The app will now scan your products. You have two primary paths:
-
Link Existing Amazon Listings: If you already sell the same products on Amazon, the app will try to match them based on SKU or UPC. You simply review and confirm the link. This connects your Shopify product to its corresponding Amazon listing for inventory syncing.
-
Create New Listings on Amazon: If the product is not yet on Amazon, you can use the app to “push” your Shopify product data (title, description, images, price) to Amazon to create a brand new listing. This will be submitted to Amazon for approval.
Fulfillment Options: FBA vs. FBM
How you ship your orders is a critical strategic choice.
Fulfillment by Amazon (FBA)
With FBA, you send your inventory in bulk to Amazon’s warehouses. When a sale occurs (on Amazon or Shopify), Amazon handles storage, picking, packing, shipping, and customer service.
-
Pro: Your products get the “Prime” badge on Amazon, which massively boosts sales. You are completely hands-off with shipping.
-
Con: FBA has significant storage and fulfillment fees. It can be complex to manage, especially if you also use dropshipping apps for Shopify.
Fulfillment by Merchant (FBM) / Self-Fulfillment
With FBM, you fulfill all orders yourself from your own warehouse or 3PL (just as you do for your Shopify orders).
-
Pro: You have full control over your inventory, branding, and packaging. You often have better profit margins.
-
Con: You are responsible for meeting Amazon’s strict shipping-time requirements (Seller Fulfilled Prime is an option but has very high standards). You don’t get the Prime badge.
Your chosen app will allow you to select which fulfillment method to use, often on a per-product basis.
Best Practices for a Successful Shopify-Amazon Integration
Connecting the stores is just the first step. Follow these best practices to thrive.
-
Optimize Product Listings for Each Platform: Don’t just copy-paste. Amazon’s search algorithm (A9) is different from Google’s. Your Amazon titles should be keyword-rich and descriptive, while your images must meet Amazon’s strict technical requirements.
-
Monitor Inventory Closely: Even with real-time sync, it’s wise to audit your inventory levels weekly to catch any mismatches before they lead to overselling.
-
Set Competitive (and Profitable) Prices: Amazon is a price-sensitive marketplace. Use your app’s pricing rules to stay competitive, but make sure you’ve factored in all Amazon fees to protect your profit margins.
-
Maintain Brand Consistency: Use the same branding (logos, product names) across both platforms. This builds trust and helps customers recognize your brand. A key part of this is leveraging reviews, which you can learn more about in our guide on how to add reviews to your Shopify store.

How to Disconnect Shopify from Amazon
If you no longer wish to use the integration, the process is simple:
-
Go to Shopify Admin: Click “Apps” in the left-hand menu.
-
Find the App: Locate the Amazon integration app you installed (e.g., CedCommerce, LitCommerce).
-
Delete the App: Click the “Delete” button. This will sever the connection and stop all syncing.
-
(Optional) Revoke Permissions: For extra security, log in to your Amazon Seller Central account, go to “Settings” > “User Permissions,” find the app under “Third-party developer and apps,” and click “Revoke.”
Final Thoughts
Learning how to connect Shopify to Amazon is a vital step for scaling an e-commerce brand. While the old native channel is gone, the new generation of third-party apps provides even more power and control.
This integration allows you to manage two powerful sales channels from one dashboard, simplifying your workflow and dramatically widening your customer reach. By choosing the right app, setting up your sync rules correctly, and following best practices, you can significantly increase your revenue. As your operation grows, you may even want to explore AI ecommerce tools to automate more of your multi-channel workflow.